SCHEDULE YOUR COMPLIMENTARY CONSULTATION

SCHEDULE YOUR CONSULTATION

"*" indicates required fields

This field is for validation purposes and should be left unchanged.
Optin

"*" indicates required fields

This field is for validation purposes and should be left unchanged.
Optin
How to Choose the Best Design Style for Your Home

How to Choose the Best Design Style for Your Home

Emser Marble Mosaic Tile Backsplash in Kitchen Remodel

Remodeling your home includes many different moving parts and one the most fun decisions you will have to make is deciding on a design style. You are going to want to choose a design style that is the most appropriate and effective for your home. From traditional to modern, to more detailed categories like country and eclectic, there are so many styles to choose from.

So how do you know which design style to choose? Well, a great place to start is by assessing the aesthetic of your current space and deciding if you want to keep or change it. Then, if you are leaning towards altering your home aesthetic, it is best to go with a design that will fit cohesively with the rest of your home without standing out like a sore thumb.

To help guide you through this fun process, here are tips on how to choose the best design style for your home!

Choose a Modern Remodeling Style Based on Your Needs


Modern farmhouse kitchen remodel in Laguna Niguel

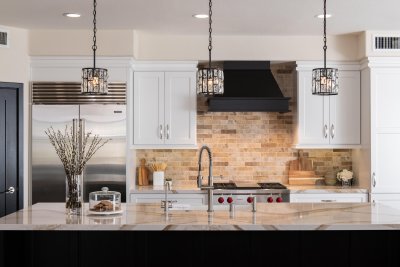
Update your home remodel even further by choosing a modern style. A modern design is one of the more popular styles because of its sleek look and minimalist features. This can either be calm and neutral or bold with an edge.

A modern design is great, but do not forget about the updated features that go with this design that may be beneficial to your home and everyday needs. If you are captivated by slick easy-to-clean surfaces, LED accent lighting with dimmer switches, and other high-tech features, a modern style may be fitting for you!

If you want to keep things more traditional, cultural, or want to incorporate more personality into your space, then there are also many other design styles that can still offer a fresh look.

Related: Top 5 Interior Design Remodeling Trends in 2021


8 Different Types of Design Styles

Choosing a design style comes down to your own personal taste. There is no right or wrong answer, but there are basic guides to help you create a well put-together space. A good place to start is with learning a little about several different styles and then choosing the one that fits you best. Here are 8 different types of the most popular design styles.

1. Traditional


Two Toned Cabinets in Coastal Kitchen

A traditional interior design roots from old European styles that tend to include elements of detailed moldings, complementing elegant furnishings, and a neutral palette with accent pieces. Traditional design styles also include intricate backsplash and floor tiling or wood patterns.

If you love showing off your antique pieces, a traditional design may be up your alley. Some other key elements include rich dark tones, sophisticated colors, and decorative architectural details like wood paneling and built-in cabinetry.

Symmetry is a main feature of a traditional design. There should always be a balance with furniture and a focal point such as a TV or fireplace.

Are you interested in taking the next step toward remodeling your home? Explore past remodels that we have done to see what we can do for you.

2. Country


Chevron-patterned-flooring

A country design style is known for showing off lacy curtains, floral patterns, and oak furniture. If you love the old country look and feel a few elements in this style include a palette of reds, deep greens, blues, grays, and rust with neutral walls.

If you are gravitating towards a country design, but still want an updated look, it is possible to blend country and modern with a contemporary country style. This incorporates clean lines and a neutral color scheme. Shaker style furniture and neat upholstered pieces are also a trending addition to this aesthetic.

In addition, the combination of woods and metals create a space that embraces other current trends while paying homage to the past.

Related: Top Fun Kid’s Bathroom Remodel Ideas


3. Arts and Crafts


San-Clemente-kitchen-remodel-with-large-peninsula

If you are a big supporter of showing off quality craftsmanship and nature, arts and crafts may be your design style. This holistic aesthetic feature natural beauty in materials that often show off plenty of wood. This design approach steers away from painted wood, and rather focuses on rich stains to preserve the beauty of the grain.

Oak wood, pine wood, and maple wood are popular types of materials that are used in arts and crafts remodel designs. When it comes to staircases, you will most likely see the detailing in the paneling and trim. This is a stylistic choice made on purpose.

If you have plenty of sturdy, simple, and comfortable pieces of furniture, this may just suit your style! Simple leather, cotton, or upholstery also makes for a softer approach to blend with the hard wood for a design that feels balanced.


4. Contemporary


White contemporary styled kitchen with marble countertops

Contemporary design is also another popular style that uses smooth lines, solid colors, and accents. In your home, if you have neat furniture with metal frames or straight legs, you may already have a contemporary style.

Although contemporary may differ than modern design, it does have some elements of modern. This style is based on what is trending in the moment mixed with neutral and simple color schemes. Whites, blacks, and grays are strong colors in this design.

Contemporary design also includes an open layout, an abundant amount of natural light, unusual layouts, metal accent pieces, and textured fabrics. Often, lighting design is also used as an artistic statement or statement piece. If you are into a fluid style and current trends with no rules of design, this is perfect for your home.

Related: Kitchen Remodeling Costs: Budget Breakdown


5. French


French styled home

If you are a fan of an elegant style filled with rich historic design, consider adopting a French style. Furniture filled with charm, a space full of elegance, open shelving, bookcases, niches, and mainly the color white! Pastel colors such as beige, light grays, light blues, and pinks are known to be used in this design as well.

If you like bright colors too, there are still other ways to incorporate them like in hung artwork or pieces of furniture. Moldings, wood and marble flooring, and high ceilings are all other elements included in this luxurious style.

French design can be on the higher end, but it is so worth it if you have the budget!


6. Eclectic


Built-in cabinetry at fireplace

Eclectic interior design uses a variety of styles and focuses on colors, patterns, and textures. Eclectic design has much more stylistic freedom than others and can even be thought of as tasteful disorder. When done well, the contrasting elements of this design can create a cohesive design and look great.

Some main eclectic design features are showing a variety of neutral colors, different pieces of furniture in the room with similar finishing and has contrast and variety. If you love a playful design that mixes new styles with old to create something unique, this design style is for you.


7. Asian


Zen-style bathroom with white walls

Looking for a calm and Zen style? Asian interior design varies from nationality to nationality, but many include natural accents such as stones, water, and plants. Balance is another key factor. The concept of Feng Shui is practiced keeping the energy in the space at a good balance.

Some Asian cultures like Chinese design includes red for good luck whereas Japanese styles use a minimalistic and neutral approach. In Japanese interior design, you will find tatami mats that take place for sofas.

Overall, the main Asian interior design elements include asymmetry, natural materials, simplicity, and clean lines.


8. Art Deco


Corona del Mar Master

Lastly, Art Deco design, which was popular in the 120s and 1930s, uses sleek lines, mirrored accents, with wood furniture and chrome hardware. Art Deco uses rich colors, bold geometry, and detailed finishes. This style is known for flaunting its glam and luxury with different shapes and symmetrical designs.

Geometric shapes are popularly used in Art Deco designed spaces and can really elevate the look and feel of a space. From tiles, to lighting fixtures, to composition of a space, there are many ways to integrate geometric shapes.

Remodeling Styles for Any Home

Overall, there are so many choices out there to choose from when picking a design style for your home. When remodeling your home, you should assess your current style and from there decide if you want to alter it completely or maybe freshen up your home with a style that is easy to transition to. This will help you with your future decisions such as picking out tile, flooring, countertops and more!

When you are ready to remodel your home, reach out to us at (949) 861-3400 and we will set you up with a complimentary design consultation.


Let’s Discuss Your Next Project!

  • This field is for validation purposes and should be left unchanged.
  • We guarantee 100% privacy for all information!

How to Choose the Best Design Style for Your Home was last modified: December 18th, 2025 by Smart Marketing
Do You Need a Kitchen Remodeling Permit

Do You Need a Kitchen Remodeling Permit

remodeling permit, department of community development Orange, California

You need a remodeling permit for any home project  that touches electrical or plumbing of any kind. This does not mean relocating plumbing or electrical, rather replacing a sink or sink faucet would necessitate a city permit.

Related: Kitchen Remodel Guide: Professional Design Details

Do You Need A Remodeling Permit?

We all want to save a buck and some time, but the correct and short answer is a “strong” yes when it comes to kitchen remodeling. We applied the word “strong” because, needless to say, some things in the kitchen most likely won’t require a kitchen permit. We understand knowing all the ins and outs of remodeling, and where the laws hold is uncertain for many who wish to add a new look to their existing kitchen.

With that said, let’s say you are remodeling an entire kitchen, and that entails the walls to be removed and replumbed. Then yes, absolutely a kitchen permit will be required! But, if you own your own home, and have no HOA to talk with, then refacing your kitchen cabinets would not require a permit.  And most homeowners will work around replacing a lighting fixture and wing it without a permit. However when working with a professional contractor, you want all the laws followed exactly as this is your safety net for ensuring your contractor is responsible for safe and legal remodeling work.

Try out one of our free remodeling workshops and learn everything you need to know about how to remodel your home.


For Your Protection? Or Whose?

Remember, we all live in Southern California and “the big one,” can strike at any time…Being protected by a permit ensures the safety of you, your family, and your home! And when selling your home, refinancing, applying for new homeowners’ insurance, just about anything can hold you back from the sale of your home due to improper permits. Nothing would be worse than letting your friend in to help with the big kitchen makeover, thinking you are saving a lot of money and realizing you have to tear it all out.

What Type of Permit Will You Need?

Well, we would love to be able to explain what “type” of permit is needed for your kitchen remodel, but unfortunately, it isn’t that simple. It all starts with what you are trying to accomplish first. From that point, a licensed professional can guide you through what it takes to get the “right” permit for your task at hand. You will be required to identify the zoning for your house and all the site improvement criteria, involving obstacles as well. Knowing whether your home is situated in a flood plain or a fire hazard zone all can make permits vary from case to case.

How Do I Get A Permit?

Obtaining a permit for yourself is available through MyOCeServices. Working with Sea Pointe Design & Remodel, or another reputable business can aid in this arduous process. You will need the property owner’s name and address, the names and addresses of the contractor and designer, the extent of work to be completed, and a record of examination activity from the start of construction through the authorized final inspection. This kitchen remodel permit provides a valuable history of your home which can assist when potential add-ons or revisions are planned.

Related: Do I need A Remodeling Permit? Remodeling Guide

Do You Need A Building Permit To Remodel Your Kitchen?

This question, again, is best left to the professionals. A skylight can have its own permit, while a typical kitchen remodel will actually involve a building permit. You will need a building permit, which may include a plumbing, electrical, and in most cases a mechanical permit.

All these sound like a daunting task just to get the ball rolling, but with our help, the permits will be our issue, not yours! We have been following the laws by the book in all aspects of home remodeling for decades.

This includes each permit you will need to keep you, your property, and us all safe and legal! Remember the permit puts the legal responsibility on the permit puller, which should always be your licensed and insured contractor.

What’s Included In A Building Permit?

kitchen remodeling permit, Orange, California

A true building permit is quite extensive. We recommend seeking advice when a full building permit is required. Action items that need to take place during the kitchen remodel is paramount for everyone’s safety (health & law wise). Items included in a building permit are:

  • Demolition Drawings
  • Fundamental Drawings and Computations
  • Structure Elevations
  • Mechanical Drawings
  • Electrical Drawings
  • Site plan and/or Grading Plan
  • Plumbing Line Drawings
  • Technical Requirements
  • Architectural Floor Plans

As you can see now, the complexity of building permits can become overwhelming for the DIY home improvement seeker. In nearly all instances, the illustrations and computations submitted for your kitchen remodel will require the signature and wet stamp of a registered architect and/or a licensed engineer.

What Happens If I Don’t Have A Permit?

If you did require a permit, and failed to obtain one, then you will face multiple challenges when the city finds this out. Failure to acquire a building permit is a violation of Contractors License Law. Additionally, construction completed without a permit can endanger a homeowner to extra responsibility and expenses.

When a service provider executes a kitchen remodel without regional building authorization, it is a breach of Business and Professions (B&P) Code sections 7110 and 7090. Free-lancers who violate the law are subject to punitive action by CSLB, comprising civil penalty charges of up to $5,000 per violation.

Hiring someone from Craigslist can cost you more in the long run when you need to sell, refinance, obtain insurance, or perform any real remodeling or repairs with a licensed company. Once the damage has been done by an unlicensed person, or those who fail to obtain ALL the proper documentation needed before undertaking the job, it is a costly job to remedy.

Typically the city will require complete removal of the remodel, and guess what…you’ll find yourself getting that permit to put your kitchen back together as well as you may incur fines from the city.  Better to be safe than sorry — measure twice and cut once and be sure to get your remodeling permit to save headaches, time, cost, and ensure your remodel is safe to live in.

Related: Kitchen Remodel Planning Guide: Where to Start & What to Expect

Final Thoughts

Due to the complexity of a kitchen remodel, and all that it entails, employing the correct company will save you time, frustrations, and money. Best of all, at the end, your kitchen remodel will be spectacular and gorgeous for years to come! Enjoying your new kitchen remodel recognizing a legitimate expert has completed the task with utmost care and consideration, while staying legal all the way, will make you and your family delighted for as long as you own own your home!

Do you want help dealing with your next kitchen remodeling project? Reach out to us and learn how we can help you transform your home.


Let’s Discuss Your Next Project!

  • This field is for validation purposes and should be left unchanged.
  • We guarantee 100% privacy for all information!

Do You Need a Kitchen Remodeling Permit was last modified: December 18th, 2025 by Smart Marketing
Lighting Upgrades to Consider for Your Home Remodel

Lighting Upgrades to Consider for Your Home Remodel

open-concept-kitchen-remodel-laguna-niguel

Brighten up your newly remodeled space by making upgrades to your lighting fixtures. Just like cabinetry colors and backsplash designs, lighting also has its latest trends and technology features. By upgrading the lighting in your home, you can also save money on your electricity bills and conserve energy.

Lighting choices can really affect a room’s design and tone. When choosing lighting for your new space, go with updated fixtures, bulbs, and switches. From going green, adding dimmers, or using smart bulbs, there are so many options to consider. This will give your home an exciting new look!

Utilize Layers

 pendant lighting kitchen remodel

The first lighting upgrade tip we recommend is to install layered lighting. Most rooms in your home probably have a single ceiling fixture accompanied by a table or floor lamp to light up the space. This concept is known as layered lighting.

Layered lighting allows you to highlight certain points of the room while providing enough ambient light. The main three types of layered lighting are ambient, accent, and task. Ambient lighting is used to give the room general coverage. Most popular types of ambient lighting fixtures are chandeliers and recessed can lighting.

Accent lighting is used to show off architectural details or decorations. Track lights and undercabinet lighting are most popular for this. And lastly, task lighting is used to help consolidate the light on a specific task area. Table lamps and vanity lighting is most used for this type of lighting.

Related: 8 Tips Making Your Kitchen Look Bigger

Go Green!

kitchen remodel with pendant lights

Incandescent light bulbs are the standard light bulb that was seen in every household until Light Emitting Diodes or LED for short became the new go-to. Compact Fluorescent Lamps are also known as CFL is another popular energy-saving light bulb.

These two bulbs rate higher in efficiency, lifespan, and color rendering. However, LED bulbs require less wattage than a CFL or incandescent bulb, making them more energy-efficient and able to last longer. They are also more cost-effective. An LED bulb will cost you only around $18 to operate versus using an Incandescent which will cost you about $90 over a 10-year span.

LEDs use about 80% less energy than incandescent bulbs and are a great green choice when considering lighting for your remodel.

Add Dimmers

Undercabinet Lighting Highliting Backsplash

Another amazing lighting upgrade we recommend when remodeling your home is to install dimmer lighting switches. This is a life changer! Dimmer lighting switches allow you to control the lighting brightness level. By reducing the light output, can also make the bulb last even longer.

Dimmer lighting switches can help save on your electric bill and minimize the cost to replace the bulbs. And these days as technology continues to advance, remote controls are even available so you can dim the light from the couch or bed by the touch of a button.

Dimmer lighting is great for setting the mood of a space. If you are looking to take a spa-like bath from the comfort of your own home, use the dimmer lighting option to set the peaceful mood by dimming the lighting to a lower brightness. In the kitchen, dimmer lighting can be used on the canned lights, undercabinet lighting, or pendants. The best part is that it is in your control!

Check out this whole home remodel with dimmer lighting here

Try Smart Bulbs

Master bathroom remodel with modern design elements

If you are a tech enthusiast, you will want to invest in smart bulbs for your home remodel. Using smart bulbs is a great way to upgrade your lighting because you will be sure to wow your guests with its cool features. Smart bulbs work by connecting to your home Wi-Fi and can be controlled from your smartphone or even a voice-activated speaker.

Smart bulbs are also easy to install. Simply just screw the bulb in and connect the bulb through your Wi-Fi and corresponding app. We recommend smart bulbs if you are into trying out the latest of technology. Some of the neat functions smart bulbs offer include dim lighting, can be controlled from anywhere in your home, can change colors, play music, and can help you sleep better.

Some smart bulbs emit color temperatures that are designed to regulate natural melatonin production in our bodies, which helps to adjust sleep. This one is worth trying!

Related: Top 5 Interior Design Remodeling Trends in 2021

If you are looking to make a change, SeaPointe Construction can help you plan your next remodel project. Learn more today!

Update Your Ceiling Fan

open layout in outdoor living

Has it been a while since you update your ceiling fan? When remodeling your home and you are upgrading your lighting, this is also the perfect time to update that ceiling fan. By updating your fan, you can save energy and refrain from hearing any loud sounds.

Newer ceiling fans are made with fan motors that use much less energy and can operate cooler than older motors. They are also made to be much quieter.

If you are altering the design of your space, you may also want to consider replacing your ceiling fan with one that complements the overall design and color scheme. Ceiling fans should operate well, but they should also match the rest of your space to elevate your home.

Check out this California Room remodel here

Swap Out Your Lampshades

Dana-Point-Master-Bath-Remodel

Moving down the list of lighting upgrade ideas are swapping out your lampshades. Believe it or not, lampshades have plenty of design power when it comes to the ambiance of your space. The lighter the shade, the more diffused light in a wider circle will emit. A darker shade tends to concentrate the light, making the space feel much darker.

If you are also deciding between different styles for your remodeling design, sometimes starting with a small element can help push you in the right direction. Swapping out your lampshade allows you to try out different colors and styles before redoing a whole space.

Related: Creating a Spa Bath on Your Next Remodel

Think Outside the Box

Creative-lighting-upgrades-to-home-remodel

Lastly, when upgrading your lighting during your home remodel, think outside the box! Get creative with your space and think about features that will maximize its function while giving you want. If you are looking for an elegant design in your bathroom remodel, install a chandelier to elevate the space. There is nothing like feeling like royalty in your own home!

Another lighting upgrade is to incorporate accent lighting to highlight gorgeous features in your new space. A popular accent lighting option is undercabinet lighting in your kitchen to show off the gorgeous backsplash you picked out. Accent lighting along stairs is also a popular lighting feature. These tend to go well with a more modern design.

If you are looking to incorporate more natural light into your new space, you may want to add skylights or large windows to your space. The more natural light that pours into the room, the brighter and larger the space appears!

Overall, lighting may be the last item on your to-do list when remodeling your home but trust us when we say that it is something to consider. Lighting can be so important in creating a certain mood or tone of the room. It is a necessary element in design.

Let us guide you through the process with our expert designers and builders. Contact us and give us a call at (949) 861-3400 to schedule your complimentary design consultation!

Read >> Top 5 Interior Design Remodeling Trends in 2021

Let’s Discuss Your Next Project!

  • This field is for validation purposes and should be left unchanged.
  • We guarantee 100% privacy for all information!

Lighting Upgrades to Consider for Your Home Remodel was last modified: December 18th, 2025 by Smart Marketing
5 Tips for Creating Indoor/Outdoor Living Spaces

5 Tips for Creating Indoor/Outdoor Living Spaces

Spacious-California-Room-remodel-in-Coto-de-Caza-backyard

The beauty of living in Southern California is that we get to enjoy the lovely warm weather throughout the year. Therefore, creating an indoor/outdoor living space in your home is a no brainer when it comes to remodeling.

There are countless options to choose from when creating this new outdoor living space of yours. From an entertainment area to an outdoor kitchen, to a relaxation oasis, it is important to determine what your intent is for using this outdoor area. Here are 5 tips for creating indoor/outdoor living spaces!

Room-addition-building-outward

1. Define the Intention of the Space

First, you should define the intention of the space. Think about the main purpose of this area and how it will be used so you can plan accordingly. If you host many dinner parties, then an outdoor kitchen or BBQ area may be more fitting than a lounge area with a big movie screen.

If you have any pets, you may also want to consider setting up a designated area for the furry friends. No matter what your main use is, make sure to make the most of the views your home has to offer. Consider the sunrise and sunset as well as any mountain views you may want to take advantage of.

Outdoor-living-remodel-Orange-County

Entertainment Area

Big on entertaining guests? Consider creating an indoor/outdoor living space that incorporates a wet bar with seating! Connect your main kitchen inside the house with a sliding door that leads to the outside bar area for extra space to entertain guests.

Another great option for an entertainment area is to create a movie and game night outdoor space. Mount a TV on the feature wall over a fireplace along with ceiling heaters and set up a comfortable couch for a cozy family area. We are fans of a space that brings family and guests together while having a fun time!

Related: 20 Backyard Entertainment Ideas

Outdoor-living-area-remodel

Outdoor Kitchen

Adding to the list of entertainment area options include remodeling an outdoor kitchen. Choose cabinetry and countertops that match your current aesthetic for a cohesive design throughout your home. Build a BBQ area and include plenty of countertop space for food prepping and equipment storage zones.

Also plan to include a separate dining table or if you are working with a smaller space, go with a two-tiered kitchen island that includes bar seating.

Orange-County-California-Room-Renovation

2. Use Nature For Your Inspiration

Using nature as your design inspiration can be beneficial in bringing that cohesive feel to your outdoor living space. Build a California Room near the pool surrounded by plants and an open layout for that airy feel.

Use natural materials and colors inspired by nature to create a Zen atmosphere that immediate takes you to a calming place when you step outside for a swim.

The position of the sun also may play a factor in your remodel. If you plan to have a TV screen up, you may want to consider mounting it to a wall where the sun does not shine on it. The wind is also another natural element to think about. Speaking with a professional designer and builder can guide you in the right direction.

Coto-de-Caza-Outdoor-Living-Space-Remodel

Plant Selection

It is no doubt that adding greenery to your indoor/outdoor living space can instantly make you feel calmer. Choose plants that are low maintenance if you are not capable of taking care of them as often. Or if you are an avid gardener, the more to choose from!

Green walls on vertical surfaces are ideal for privacy, while leaving overhead space open to still see the blue skies. It is also important to note that you may not want to put flowers near your dining area as they can attract bees and insects.

Sunlight

The sun can really affect your comfortability in enjoying a space. If your home receives a lot of early evening sunlight, you will want to provide an outdoor area with plenty of shade. Also, add an umbrella to your dining table, so you do not have to worry about the time of day while going out for a cup of coffee.

Wind Patterns

Before remodeling your outdoor living space, do your research and notice the wind direction and the time of day. Certain areas may be calm in the afternoon but then they may pick up in the evening. The last thing you want is a fire pit with seating that is downwind. A breezy dinner area is also not ideal.

San Clemente Hillside Deck Addition

3. Choose Your Furniture

Create your perfect outdoor living space by picking stylish furniture pieces that are sturdy and are weather-resistant. Garden chairs are a great option that are not bulky and will not look out of place. Place them around an outdoor rug or around a table for that cozy sociable set-up.

Other popular outdoor furniture pieces are benches, sofas, bistro sets, side tables, garden furniture, lounge chairs, armchairs, seats with an ottoman, rocking chairs, hammocks, or even a day bed. If you have an outdoor bar area, go for bar stools.

For larger patio areas, sectionals and love seats are appropriate to create a lounging atmosphere. Before purchasing any patio furniture, make sure to try it out and see if it fits your comfort needs and fits in your new space.

Tustin-Home-Remodel

4. Cover Your Outdoor Area

When remodeling your home to build an indoor/outdoor living space, our design experts suggest covering your patio. This is because it will make your space feel like an extension of the interior rooms. At least with a partial covering, the two areas will flow together seamlessly.

A few options for outdoor coverings include a solid roof, pergola, beams, or shade sails. You and your guests should enjoy the area without having to worry about the sun beaming on you or the rain ruining your outdoor gathering.

large-bi-fold-glass-doors

5. Connect Your Space with Doors

Another way to maintain a cohesive design with your indoor/outdoor living space is to connect the two with doors. This will give your guests the option of stepping inside or outside if they please. And the bigger the door, the better for a more spacious feel.

A few popular door options are a folding window wall, over-sized pocket doors, bi-fold glass doors, or large sliding doors. The only downside to sliding doors is that only half of the door opens. This may make you feel like there is a large window or barrier still there.

Outside-living

Making your outdoor space stylish and comfortable does not have to be complicated or expensive. With so many design options to choose from, our design experts will guide you through your remodel while keeping your budget and visual goals in mind.

Connecting your indoor and outdoor living space will elevate your lifestyle and maximize the square footage you already have. After doing your research and figuring out what your purpose is for using this new space, make sure to know what your budget is. This will help you with choosing tile, cabinetry, countertops, and furniture. Designing your new patio is fun especially when working with an expert to help you along the way!

When you are ready to remodel your outdoor living space, contact us for a complimentary design consultation at (949) 861-3400.

Related: Designing Your California Room Like a Pro

Let’s Discuss Your Next Project!

  • This field is for validation purposes and should be left unchanged.
  • We guarantee 100% privacy for all information!

5 Tips for Creating Indoor/Outdoor Living Spaces was last modified: December 11th, 2025 by Smart Marketing
DIY Screen Door Repair [Tips and Tricks]

DIY Screen Door Repair [Tips and Tricks]

Sliding screen door repair

The screen door provides protection from bugs and keeps our furry ones inside; we don’t often think about them until…they need repair.  We all know after time your screen door will eventually need some TLC. Having a repairman in the house during these uncertain times can make some homeowners feel uncomfortable. Well, fear not, fixing a screen door is much easier than most would think. With just one trip to the DIY store, or an online order, and a few tools (which you probably already own), your screen door will look good as new! Below, we will instruct you on all the tools you need to repair, patch, or even install new tracks on your screen door.

Related:  The 8 Best Timeless Kitchen Design Ideas of 2021

Tools You Will Need

Welcome to 2021 where life has gotten more simplified via online shopping! In today’s world, you can click a few buttons, and for $10 receive a screen door repair kit in a day or so. A typical kit includes a screen tool, screen roller tool with bearing, as well as a spline tool. These make it easy to slide a new screen into place. A flat-head screwdriver, a utility knife, a pair of scissors, and clamps will all come in handy for this DIY task. And, of course, let’s not forget about the screen itself. Usually made from fiberglass, and charcoal is the most common color. But the options are many and come at an incredible low price!

Replacing A Screen

When stains, tears, and holes are the consequence of routine wear and tear on the screen of your door, replacing an entrance screen in its current frame is quick and painless. Just put the frame and broken screen down on a flat exterior that you can work around effortlessly. 

Removing The Old Screen

If the spline is still undamaged, pull it off to discharge the former screen. Then just keep that cordage for the new screen. Even if the spline is easily removed, be sure to check for sun damage. If it is starting to crack, or has any sun-fading showing, it will be best to replace since the cost is so nominal. For less than $5, you can get enough spline (approx. 25 feet) to secure your new screen door.

If sun damage has occurred, break out that flat-head screwdriver and start digging out the worn spline. Stay safe by plying away from your body! And make certain not to bend the rails out where the new screen will be laid. Once that chore is completed, that old screen will be cleanly removed. 

Are you considering a home remodel? We specialize in kitchen design and remodeling with quality construction. Visit Sea Pointe Design & Remodel today! 

Installing The New Screen

The first thing that needs to happen is measuring the new screen. Spread the span of the new screen to cover the frame, leaving a half an inch minimum of overlap. The screen will get tighter as you mount it; so, you will finish with additional screen all around the edges. Trimming that excess fabric later is way better than cutting it too close for your spline to not fit snuggly!  

Next, the screen spline installation tool has both curved and dipped rollers on it that provides the forcing of the spline into the framework to secure the new screen. Start by taking the spline and aligning it around the screen and the groove in the frame. Using the dipped point of the tool to push it into place by moving gradually all along the entire stretch of the frame. Hang on to the screen tautly with one hand while you rotate with the other. Otherwise, you may discover that the screen clumps in some spots. As you get to the right-angles of the border, drive the spline into the edge, then apply the curved roller to firmly secure it by pressing hard. We always suggest rolling over the full distance of the spline once more with the curved roller to safeguard that it is entirely pressed into the framework.

Lastly, time to cut that extra screen. Employ your utility knife to cut down off any surplus spline and/or screen. To eliminate the additional screen, cut all along the interior of the framework directly above the spline for a lovely, tidy, and professional look!


Hand replacing the screen in a screen door.

Patching A Screen

Sometimes, the kitty or new puppy can’t resist playing with the screen. That’s ok because patching is just as easy as replacing a new screen! And again, we reach out to the world wide web to find screen mending and patching products that are very inexpensive and simple to use. One product online claims it’s as straightforward as to just cut their screen slightly bigger than your problem hole or tear, remove the backing, stick it onto your damaged section, then apply heat from your hairdryer. Then trim your excess once dried. 

Then, the old fashioned method of patching a screen is actually the same as above. Just get a piece of the same screen you own, cut it to the size of your rip or hole in the screen you need repaired, then gently add a bit of super glue to attach. Make sure you don’t drip anywhere! Use very sparingly so all the little holes of the screen remain as little holes, not a filled in square of glue.

Related: Renovating a Farmhouse: The Ultimate Guide

Dragging Wheels & Other Troubles

While the constant opening and closing of your screen door continues for a long duration, dirt, dust, and hair can impede the movement of your screen door. This is the time when most find the screen door off its tracks, and in your hand, holding the latch with a screen door attached.  It can be very frustrating (especially if you were in a hurry and just leaving). There are a few solutions to ensure your screen door stays intact upon every slide. 

Adjusting the wheel tension is one of the quickest remedies for a smooth glide. With nearly every screen door, there will be two adjustment screws. These are easily located if you have your owner’s manual, or you can look it up online. Ninety-nine percent of the time, these screws will be at the top or bottom of your screen door. Using a Phillips screwdriver, simply tighten or loosen the screw or screws until you feel the glide is right for you and your home. Too loose, and it will be wobbly and fall off. Too tight, then the movement will be hindered. 

Another issue people commonly report is the handle does not flush directly into the port provided. This creates a gap in which bugs can still get into the house. The biggest tip is to never slam shut a screen door! They are not made out of high quality materials typically, so a plastic handle with a piece of metal can easily be misaligned. If this does happen to you, bending back the metal internal clamp with needle-nose pliers can resolve the issue. If it has been bent too badly, a replacement handle is only a couple of dollars and a couple of screws to replace. 

Cleaning Or Replacing Wheels

When that grime keeps your glide not as smooth as it should be, then it’s time to clean. Have you ever wondered why keep on old toothbrush? Here’s the reason! First, we suggest blowing out the track with either a blower or canned air first. Get the dry stuff out. Thereafter, clean like there is no tomorrow with that old toothbrush and some grease fighting dish soap. Once everything looks good to go, dry your track and see if that helps the wheels. 

Removing the wheels is not a tough job in itself. Unscrew and clean the wheels thoroughly or let them soak in a soapy solution before cleaning if they are really grimy. If this does not give you the smoothest glide of a screen door you have ever felt, then maybe the wheels do need replacing. Checking the current prices on screen door wheels indicates a range from $3.68 all the way to a whopping $14.49 for the “high-end” screen door wheel. Always replace it with the current make and model to ensure compatibility. 

Replacing Tracks

Ok, so we waited for the last segment for the toughest issue: Replacing tracks. Please don’t be intimidated. Again, all a screen door is is mesh, metal, and plastic. The steps are pretty upfront. First, remove the screen door. Now, the “hard part” which entails removing the old door track by taking out the screws that fasten it in position. Have someone to help you out by squeezing downward on one end of the track so it won’t bend when you move it. Gauge by accurately measuring the distance of the old track so you know how long the new track should be cut/ bought. Get rid of the upper track from the top of the door in the identical fashion. Taking the old track to your home improvement store to use as a guide will definitely save you multiple trips!

Related: 20 Backyard Entertainment Area Ideas

Final Thoughts About Screen Doors

Seriously, the screen door is something most don’t think about often. When you want fresh air, or easy access to the backyard, the screen door is your best friend! Keep it clean so you don’t have to worry about gummy tracks. Even clean the screen itself once a month with a damp cloth to ensure air is coming in at its highest volume. We all know the infomercial with the magic screen door that is held together with magnets. These are ok for a backdoor, but they will waft in the wind, and open more often than not.

When purchasing a new screen door, the trim of the screen door itself should be paramount. Make certain it fits your décor and does not look too inexpensive. Even screen doors have their echelons. And the price should not be an issue since it will add huge value to your home for only $17.99 all the way up to $430 (as of last price check). Paying this price to maintain fresh air, easy access, and added value to your home should be your next home decision!

Are you looking for high quality construction for your home remodel? Our team of award-winning designers, experienced project managers, and skilled craftsmen will provide you with the most positive, successful, and fun home remodeling experience. Contact Sea Pointe Design & Remodel today to learn more.

Let’s Discuss Your Next Project!

  • This field is for validation purposes and should be left unchanged.
  • We guarantee 100% privacy for all information!

DIY Screen Door Repair [Tips and Tricks] was last modified: December 18th, 2025 by Smart Marketing